You know, I’ve been seeing custom tumblers everywhere lately – from my morning coffee run to my friend’s latest Instagram post featuring her new personalized travel mug.
It feels like everyone is absolutely obsessed with expressing their unique style through their everyday essentials, and honestly, who can blame them? I mean, gone are the days of plain, boring drinkware!
We’re living in a time where a simple tumbler isn’t just for hydration; it’s a vibrant extension of your personality, a mini billboard for your brand, or even a heartfelt gift that truly speaks volumes.
I’ve personally experimented with a few different methods myself, trying to find that perfect blend of durability, aesthetics, and eco-friendliness, because let’s be real, sustainability is a huge factor these days.
It’s truly amazing how a well-designed tumbler can make your daily routine feel a little more special and keep your drinks at just the right temperature for hours on end.
If you’ve been itching to dive into the world of custom tumbler creation, whether for yourself, your business, or as a thoughtful present, you’re in the right place.
Trust me, the possibilities are endless, and getting started is probably easier than you think! Let’s get down to the nitty-gritty and truly explore how to create those standout custom tumblers that everyone will adore.
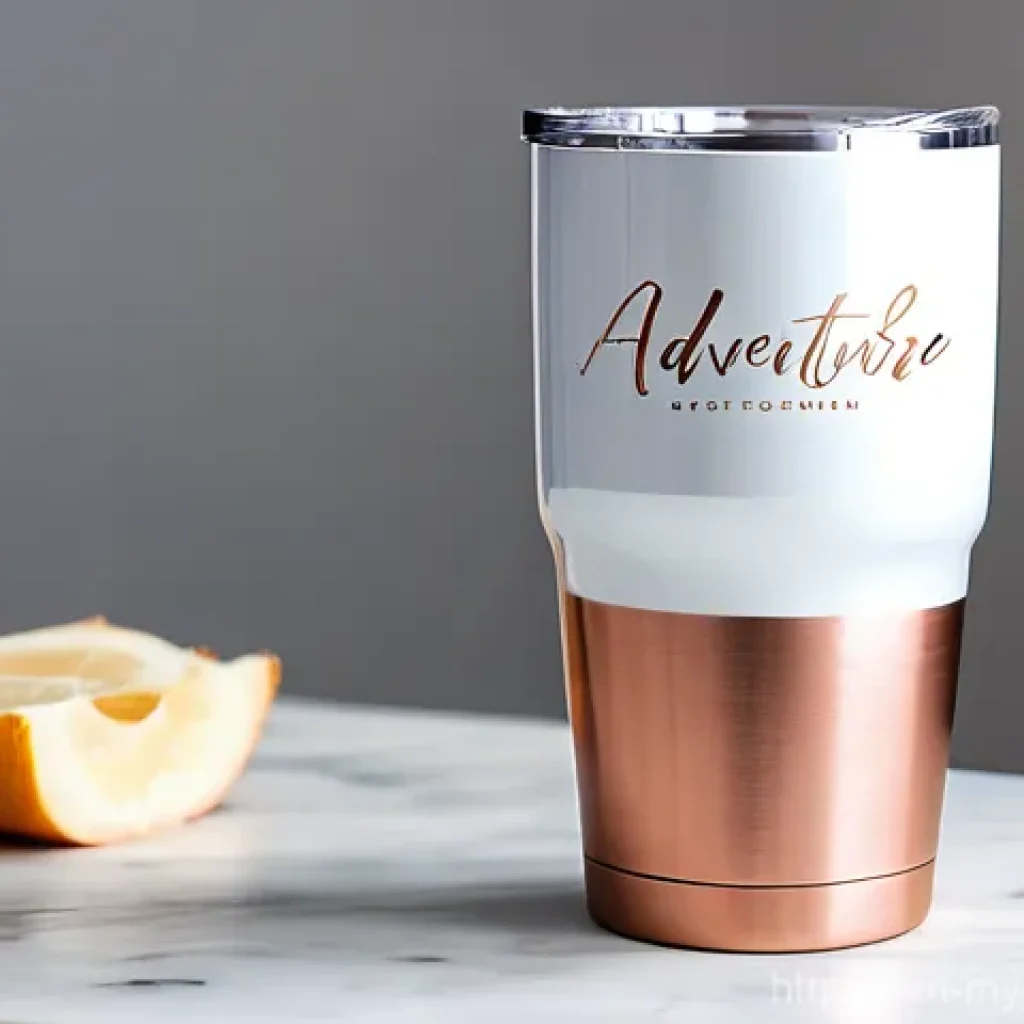
Unleashing Your Inner Artist: Choosing Your Customization Canvas

You know, the first time I really dove into creating my own custom tumblers, I was a little overwhelmed by all the options out there. It felt like walking into an art supply store without a clue where to start! But honestly, that’s half the fun. It’s all about finding that perfect method that resonates with your vision, your skill level, and ultimately, the look you’re going for. I’ve personally experimented with vinyl decals, gotten my hands wonderfully messy with epoxy, and even dipped my toes into the world of sublimation. Each method has its own charm, its own quirks, and its own special place in the custom tumbler universe. What I’ve found is that really understanding these different “canvases” is the first step to truly bringing your creative ideas to life. It’s not just about slapping a design on; it’s about choosing the right medium to make that design sing, ensuring it stands up to daily life, and of course, making sure it feels authentically ‘you’ or perfectly represents the person you’re making it for. Trust me, the learning curve is part of the adventure, and with each tumbler, you’ll discover new favorites and refine your personal touch.
Decal Dreams: Vinyl’s Versatility and Charm
Vinyl decals are often the entry point for so many custom tumbler creators, and for good reason! They’re incredibly versatile, relatively forgiving, and can produce some seriously sharp designs. I remember my very first custom tumbler was a simple initial decal I cut with my craft machine, and honestly, the satisfaction of peeling away that transfer tape was immense! You can layer different colors, create intricate patterns, and even achieve a bit of a textured feel. It’s fantastic for quotes, logos, and crisp graphics. The key here, from my experience, is really good quality permanent vinyl and taking your time with the application. Rushing it almost always leads to bubbles or misalignments, and nobody wants that! I’ve learned that a good quality transfer tape makes all the difference, and don’t be afraid to use a squeegee to really adhere your design. Plus, the sheer variety of vinyl finishes—from matte to gloss, glitter to holographic—means the creative possibilities are practically endless. It’s such a fantastic way to express personality without a huge initial investment.
Sublimation Sensation: Vibrant, Seamless Designs
If you’re looking for that seamless, “baked-in” design that feels completely integrated with the tumbler, then sublimation is probably calling your name. This method uses special ink that turns into a gas when heated, infusing directly into the tumbler’s coating. The results are absolutely stunning—think vibrant, full-wrap designs with no texture or raised edges. I’ve seen some incredible photo-realistic designs created with sublimation, and the colors just pop in a way that’s hard to achieve with other methods. My own journey into sublimation was a bit of a learning curve, primarily because you need specialized equipment like a sublimation printer and a heat press (or a convection oven for certain types of tumblers). But once you get the hang of the temperature and time settings, it’s incredibly rewarding. The designs are super durable, dishwasher safe, and won’t peel or fade. It truly feels like creating a piece of art that’s also incredibly functional.
The Secret Sauce: Diving Deep into Different Decoration Techniques
Okay, so once you’ve picked your design path, the next step is actually bringing it to life! This is where the real magic happens, but also where tiny details can make or break your masterpiece. I’ve spent countless hours in my craft space, meticulously applying decals, carefully pressing sublimation prints, and even (gasp!) dealing with epoxy that didn’t cure just right. Each technique has its own rhythm, its own set of tools, and its own little dance you have to learn. It’s not just about sticking things on; it’s about understanding adhesion, curing times, temperature, and how all these elements play together to create a lasting, beautiful product. And trust me, there’s a huge difference between a tumbler that looks great for a week and one that becomes a beloved, everyday essential for years. Getting these techniques down pat is what separates a good custom tumbler from a truly exceptional one.
| Method | Best For | Durability (General) | Learning Curve | Key Equipment |
|---|---|---|---|---|
| Vinyl Decals | Logos, Text, Multi-color designs, Layering | Good (Hand wash recommended) | Beginner-Friendly | Cutting machine, weeding tools, transfer tape |
| Sublimation | Full-wrap designs, Photos, Gradient colors, Seamless graphics | Excellent (Dishwasher safe) | Moderate (Requires specific equipment) | Sublimation printer, heat press/oven, sublimation paper, ink |
| Epoxy/Resin | Glitter, Abstract art, Layering embellishments, High-gloss finish | Excellent (Very durable) | Moderate to Advanced (Messy, specific safety needs) | 2-part epoxy resin, glitter/pigments, turning motor, heat gun |
DIY Delights: Crafting at Home with Confidence
There’s something incredibly satisfying about creating something beautiful with your own two hands, right? For the DIY enthusiast, custom tumblers offer a fantastic outlet. For vinyl, it’s all about precision. I remember one time I rushed a large decal application and ended up with a massive air bubble that refused to budge. Lesson learned: go slow, use a hinge method, and have your squeegee ready! For sublimation, the magic really happens in the heat press. Getting the right pressure and temperature for the correct amount of time is crucial. I’ve had more than one “ghosting” incident (where the design looks blurry because the paper shifted), which taught me the importance of securely taping my sublimation prints. And epoxy? Oh, epoxy is a whole different beast! It’s so rewarding when you get that glassy, smooth finish, but mixing ratios have to be precise, and you need good ventilation. I’ve definitely had sticky tumblers that didn’t cure properly because I eyeballed the mixture once. Never again! The beauty of DIY is that you learn from every mistake and every success, building your skills and confidence with each new project.
Professional Polish: When to Call in the Experts
While I absolutely adore the DIY process, there are definitely times when stepping back and letting the pros handle it is the smart move. For instance, if I need a very large batch of tumblers with identical, high-resolution branding for a corporate event, I’m probably not going to fire up my home sublimation setup. Professional services often have industrial-grade equipment that can produce consistent quality at scale, often with faster turnaround times. They might also offer specialized printing techniques that are difficult to replicate at home, like laser engraving or intricate multi-color screen printing on curved surfaces. I’ve used professional services myself when I needed a super crisp, high-volume order that went beyond what my home studio could realistically produce. It’s about knowing your limits and understanding when the investment in professional quality and efficiency is worth it. Plus, sometimes it’s just nice to have someone else do the heavy lifting, especially when deadlines are tight!
Beyond the Bling: Picking the Perfect Tumbler Base
You know, for all the talk about dazzling designs and fancy techniques, choosing the right tumbler itself is often overlooked, but it’s absolutely fundamental to a great custom product. It’s like picking the perfect canvas before you even think about painting. I’ve seen some truly gorgeous designs fall flat because they were put on a flimsy, poorly insulated tumbler. And let’s be real, nobody wants their iced coffee to melt in an hour, or their hot tea to get cold before they finish their commute! I’ve personally experimented with various brands and materials, looking for that sweet spot of durability, insulation, and a good surface for customization. The shape, the lid style, even the texture can drastically change the final look and feel of your custom creation. It really boils down to thinking about the end-user experience. Is this for a busy commuter who needs a leak-proof lid? Or a student who wants something lightweight for their backpack? These considerations are just as important as the glitter or the graphic you choose.
Material Matters: Stainless Steel, Plastic, and Beyond
When it comes to tumbler materials, stainless steel is often king, and for good reason. It offers fantastic insulation, keeping drinks hot or cold for hours, which is a huge selling point. I personally swear by double-walled, vacuum-insulated stainless steel for my own daily coffee and water. They feel substantial, look sleek, and are incredibly durable. However, not all stainless steel tumblers are created equal; some have better coatings for sublimation, others are great for vinyl application. Then there’s plastic. While it might not offer the same thermal properties, plastic tumblers can be much lighter and often come in a wider variety of fun colors and shapes at a more accessible price point. They’re great for things like cold brew or just water for a quick errand. Acrylic tumblers, for instance, are popular for glitter and liquid-filled designs. And don’t forget glass! While less common for custom work due to fragility, glass tumblers offer a really clean aesthetic, especially for a minimalist design. Each material brings its own set of pros and cons, and choosing wisely really impacts the longevity and usability of your finished product.
Sizing Up Your Style: Capacities and Shapes
Just like picking the right material, the capacity and shape of your tumbler are crucial design decisions. A sleek, tall 20oz skinny tumbler is going to give a completely different vibe than a chunky 30oz handle mug. I always think about who the tumbler is for and how they’ll use it. A 12oz tumbler is perfect for a small coffee or for kids, while a 40oz behemoth with a handle is ideal for someone who needs to stay hydrated all day without constant refills. I’ve definitely learned that some shapes are easier to customize than others. Straight-walled tumblers are a dream for sublimation, while tapered ones can present a challenge for full wraps. Ergonomics matter too! Does it fit in a car cup holder? Is it comfortable to hold? Does the lid screw on securely and prevent spills? These might seem like small details, but they make a huge difference in how much someone loves and uses their custom tumbler. Picking the right canvas size and orientation is just as important as the artwork itself, ensuring your design looks fantastic and functions flawlessly.
Making Your Masterpiece Last: Durability Hacks and Care Tips
Okay, so you’ve poured your heart and soul into creating this amazing custom tumbler, right? It looks fantastic, your design is flawless, and you’re feeling incredibly proud. But here’s the kicker: how do you make sure that masterpiece stands the test of time? Because let’s be honest, a custom tumbler that peels, scratches, or fades after a few uses is just plain heartbreaking. I’ve had my share of tumblers that didn’t quite make it past the “new and shiny” phase, and it taught me invaluable lessons about protection and proper care. It’s not just about the initial creation; it’s about making sure your hard work endures daily commutes, accidental drops, and countless washes. Trust me, putting in a little extra effort here makes a monumental difference in the lifespan and perceived value of your custom creation. You want that tumbler to be a long-term companion, not a fleeting trend!
Sealing the Deal: Top Coats and Protective Layers
For vinyl decals, a good top coat can be a game-changer for durability. While permanent vinyl is pretty robust on its own, adding a layer of sealant can really lock everything in and provide an extra shield against scratches and peeling. I’ve personally used food-safe sealants, and even a thin, even coat of a clear spray sealant (making sure it’s safe for the tumbler material) can do wonders. For those incredible glitter and epoxy tumblers, proper epoxy application itself acts as the ultimate protective layer. The key here is a smooth, even cure with no sticky spots. I’ve had tumblers where the epoxy was too thin in one area, leading to a weak spot, so getting the mixing ratios and rotation just right is absolutely critical. For sublimation, the design is literally infused into the coating, so usually no extra sealing is needed, which is one of its big advantages. But for other methods, a thoughtful protective layer is like giving your artwork armor; it ensures your beautiful design can handle the bumps and spills of daily life without losing its luster.
Wash Wisdom: Keeping Your Custom Tumbler Pristine

This might seem obvious, but how you wash a custom tumbler makes a monumental difference in its longevity. Let me tell you, I’ve learned this the hard way! For most custom tumblers, especially those with vinyl decals or epoxy, hand-washing is your best friend. Those powerful jets and high temperatures in a dishwasher can be incredibly harsh, causing vinyl to peel, epoxy to dull, or even certain coatings to break down over time. I always recommend using warm, soapy water and a soft sponge. Avoid abrasive scrubbers that can scratch your beautiful design. For sublimation tumblers, you usually have a bit more freedom; many are indeed dishwasher safe, but always double-check the manufacturer’s recommendations. Even then, I personally still prefer hand-washing mine to extend their life as much as possible. Proper drying is also key – letting water spots sit can sometimes affect finishes. Taking an extra minute or two to lovingly hand-wash and dry your custom tumbler isn’t just about cleaning; it’s an act of preservation, ensuring your hard work stays vibrant and beautiful for years to come.
From Hobby to Hustle: Turning Your Tumbler Passion into Profit
You know, there comes a point for many of us passionate creators where we look at our growing collection of custom tumblers and think, “Hey, maybe I could actually sell these!” And honestly, why not? If you’ve got a knack for design, a steady hand, and an eye for quality, your hobby absolutely has the potential to become a thriving little business. I remember when I first started getting requests from friends of friends, it felt incredible to realize that something I loved doing could also bring in some extra income. But turning a creative passion into a profitable venture isn’t just about making beautiful things; it’s about understanding the market, valuing your time and talent, and getting your amazing creations into the hands of eager customers. It’s a journey that combines creativity with a bit of business savvy, and it’s incredibly rewarding to see your passion not just appreciated, but also valued financially.
Pricing Your Prowess: Finding Your Sweet Spot
One of the trickiest parts of selling custom tumblers is figuring out how to price them. It’s a balancing act between covering your costs (materials, time, and overhead like electricity or software subscriptions) and making sure your prices are attractive to customers while still reflecting the quality and effort you put in. I’ve made the mistake of underpricing my work in the past, only to realize I was barely breaking even for hours of intricate design and application. Don’t forget to factor in the cost of the tumbler itself, all your materials (vinyl, epoxy, glitter, ink, paper), and importantly, your time! Your time is valuable expertise. Research what similar custom tumblers are selling for on platforms like Etsy or local craft markets. Consider different tiers of customization – a simple decal might be one price, while a full epoxy glitter tumbler with multiple layers will command a higher price. It’s about finding that sweet spot where you feel fairly compensated for your skill and effort, and your customers feel they’re getting a great value for a unique, handmade item.
Marketing Your Magic: Getting Seen and Sold
So, you’ve got your gorgeous custom tumblers, you’ve priced them fairly, now how do you get them noticed? This is where your inner marketer comes out! In today’s world, social media is your best friend. High-quality photos and short, engaging videos of your tumblers in action can work wonders. Think about showing off the glitter sparkle, the seamless finish of sublimation, or how a design looks when someone is actually using it. I’ve found that showing the process can also be really captivating – a quick time-lapse of a decal application or an epoxy pour can really draw people in. Instagram, TikTok, and even local Facebook groups are fantastic places to share your work. Don’t be shy about asking satisfied customers for testimonials or photos of them with their tumblers! Word-of-mouth is still incredibly powerful. Participating in local craft fairs or setting up a simple online shop are also great ways to get your creations in front of potential buyers. Remember, people buy stories and connections as much as they buy products, so let your personality shine through in your marketing!
Troubleshooting Tumbler Triumphs: What to Do When Things Go Sideways
Let’s be real, even the most experienced crafters run into snags sometimes. It’s just part of the creative process! I’ve certainly had my fair share of “oops” moments with custom tumblers – uneven epoxy, crooked decals, faded sublimation prints. The key isn’t to avoid mistakes entirely (because let’s face it, that’s impossible!), but to know how to troubleshoot them, fix what you can, and most importantly, learn from them. Every single project, whether it turns out perfectly or not, teaches you something new about materials, techniques, and even your own patience. I used to get so frustrated when something didn’t go according to plan, but now I see it as a puzzle to solve or an opportunity to refine my skills. It’s all part of the journey to becoming a truly masterful tumbler creator, and honestly, sometimes the “happy accidents” lead to the most unique and beloved designs!
Common Catastrophes and Quick Fixes
So, what are some of those common “oh no!” moments? For vinyl, bubbles are a big one. My go-to fix is often a tiny pinprick and then smoothing it down with a squeegee. Sometimes, if a decal is slightly crooked and I catch it quickly, I can carefully lift and reposition it, but you have to be super gentle to avoid stretching the vinyl. For epoxy, issues can range from “fish eyes” (small craters) to uncured sticky spots. Fish eyes often mean the tumbler wasn’t clean enough or there was some contamination; sometimes a second, very thin layer can fix it. Uncured spots usually mean the mixing ratio was off, or it wasn’t mixed thoroughly enough – unfortunately, for that, a full strip and redo is often the only real solution. With sublimation, “ghosting” or blurry images typically mean the sublimation paper shifted during pressing, or not enough pressure was applied. Ensuring your design is securely taped and your press settings are accurate usually prevents this. The important thing is not to panic, assess the situation, and then calmly apply the best fix!
Learning from the Lumps: Embracing the Imperfections
While we strive for perfection, sometimes a small imperfection simply adds character, right? I’ve made tumblers that weren’t absolutely flawless, but the recipient still loved them because of the care and effort they saw. And honestly, some of my own favorite tumblers have a little quirk here or there that reminds me of the process. Every time you encounter a problem, it’s a chance to learn and grow. Maybe you realize you need better lighting in your workspace, or a more precise measuring tool for epoxy, or even just more practice with your heat press. Don’t let a mistake discourage you! Instead, analyze what went wrong, research solutions, and apply that knowledge to your next project. It’s all about continuous improvement. The lumps and bumps along the way aren’t failures; they’re valuable lessons that contribute to your expertise and make your journey as a custom tumbler creator even richer and more authentic. Embrace them, learn from them, and keep creating!
Wrapping Up Our Creative Journey
Well, we’ve covered quite a bit, haven’t we? From the initial spark of choosing your customization method to the nitty-gritty of making your tumbler last, and even dipping our toes into turning your passion into a tidy profit. It’s been a real joy sharing my own experiences and what I’ve learned along this incredibly rewarding journey. Creating custom tumblers isn’t just about making a pretty cup; it’s about pouring your creativity and a piece of yourself into something tangible that brings joy, functionality, and a touch of unique style to everyday life. I truly hope this deep dive inspires you to experiment, learn, and perhaps even launch your own tumbler adventure. Remember, every project is a chance to grow, and every custom tumbler you create tells a story. So, go forth and craft something amazing!
Handy Tips for Tumbler Enthusiasts
1. Master Your Materials: Always, always, always read up on the specific type of vinyl, sublimation paper, or epoxy you’re using. Each brand can have slightly different application instructions, cure times, or temperature settings that can drastically impact your final result. Don’t be afraid to do a small test piece first! It’s saved me from bigger headaches more times than I can count.
2. Cleanliness is Key: Before applying any design or coating, thoroughly clean your tumbler surface. Even tiny specks of dust, oils from your hands, or residues can cause issues like bubbles under vinyl, “fish eyes” in epoxy, or imperfect sublimation transfers. A quick wipe with isopropyl alcohol can make all the difference.
3. Patience Pays Off: Whether you’re weeding a intricate vinyl design, waiting for epoxy to cure, or allowing a sublimation tumbler to cool, rushing the process is a recipe for disaster. Take your time, let things set properly, and you’ll be much happier with the durable, professional-looking outcome. Trust the process, even when it feels slow!
4. Invest in Quality Tools (Gradually): While you don’t need all the top-tier equipment from day one, gradually investing in good quality tools can significantly improve your results and make the crafting process more enjoyable. A sharp weeding tool, a reliable heat press, or a precise measuring scale for epoxy can be game-changers as your skills develop. You’ll thank yourself later!
5. Document Your Journey: Keep a little notebook or a digital file of your projects. Jot down the materials used, settings (for presses/ovens), any challenges you faced, and how you solved them. This personal log becomes an invaluable resource for troubleshooting and replicating your successes, turning every project into a learning opportunity.
Key Takeaways for Your Tumbler Adventures
Creating custom tumblers is a delightful blend of artistry and practicality, offering endless opportunities for personal expression or even a lucrative side hustle. The core lesson is to meticulously choose your method—vinyl, sublimation, or epoxy—each offering unique aesthetics and durability, directly impacting the final look and feel of your personalized drinkware. Remember that the quality of your tumbler base, particularly insulated stainless steel, is just as crucial as the design itself for ensuring long-lasting appeal and functionality. Hand-washing is generally recommended for longevity, especially for vinyl and epoxy-coated items, ensuring your beautiful creations withstand daily use. If you’re considering turning this hobby into a business, smart pricing that values your skill and time, coupled with engaging marketing, is essential for transforming your passion into a profitable venture. Ultimately, embrace the learning curve, celebrate your successes, and don’t be afraid to troubleshoot challenges; every step refines your craft and builds your confidence as a true tumbler artist.
Frequently Asked Questions (FAQ) 📖
Q: What are the most popular ways to customize a tumbler, and which one is best for beginners?
A: Oh, this is such a fantastic question, and one I get all the time! Honestly, the world of custom tumblers has so many exciting avenues. From my own adventures in crafting, I’ve found that the most popular methods usually boil down to a few key players.
You’ve got vinyl decals, which are super popular for their ease of use and vibrant colors. I mean, who hasn’t seen those adorable personalized tumblers with names or fun quotes?
Then there’s sublimation, which is a bit more advanced but creates these absolutely stunning, permanent, full-color designs that truly pop. Think of those intricate patterns or photographic images that wrap seamlessly around the tumbler.
And let’s not forget epoxy resin, which gives that gorgeous, glossy, almost glass-like finish, often with glitter or other embedded elements – it’s definitely a labor of love but the results are just breathtaking.
For anyone just dipping their toes into this creative pond, I would wholeheartedly recommend starting with vinyl decals. I remember my first few attempts with vinyl; it was surprisingly forgiving, and the learning curve was pretty gentle.
You just need a cutting machine (like a Cricut or Silhouette, which are so much fun to play with!), some good quality vinyl, and a bit of patience. It’s perfect for getting comfortable with the process, understanding how designs translate to a physical object, and seeing your vision come to life quickly.
Plus, the satisfaction of peeling off that transfer tape to reveal your perfectly customized tumbler? Pure bliss! It’s an incredibly rewarding starting point that truly builds confidence before you even think about diving into the more complex, but equally amazing, worlds of sublimation or epoxy.
Q: Beyond personal use, how can custom tumblers really make an impact for businesses or as thoughtful gifts?
A: That’s a brilliant way to think about it! While I absolutely adore personalizing tumblers for myself and my family, I’ve seen firsthand how they can be total game-changers for businesses and incredibly meaningful as gifts.
For businesses, custom tumblers are like having mini, portable billboards that people actually want to carry around. I’ve helped so many small businesses create tumblers with their logos or unique branding, and the feedback is always amazing.
Imagine your loyal customers sipping their morning coffee from a tumbler proudly displaying your brand – it’s consistent, subtle, and incredibly effective marketing.
It boosts brand recognition and shows you care about quality and sustainability, especially if you opt for reusable options. Plus, they make fantastic corporate gifts for employees or clients.
On the gifting front, oh my goodness, a custom tumbler speaks volumes! I personally love giving them because they show so much thought and effort. Instead of just another generic mug, you’re giving something tailored to the recipient’s personality, hobbies, or a special inside joke.
I once made a tumbler for my best friend with a design representing her favorite hiking trail and her dog’s silhouette – she literally cried happy tears!
It’s not just about hydration; it’s about creating a tangible memory, a daily reminder of your connection, or a celebration of their unique identity. It truly elevates the everyday into something extraordinary.
Q: With so many options out there, what should I really look for to make sure my custom tumbler is durable, eco-friendly, and truly worth the investment?
A: Okay, this is where my practical side kicks in, because while aesthetics are important, durability and sustainability are absolute non-negotiables for me!
I’ve had my share of tumblers that looked great but fell apart after a few washes, and trust me, that’s incredibly disappointing. So, here’s my insider advice based on years of testing and using different brands: First and foremost, look for high-quality, food-grade stainless steel, specifically 18/8 or 304 grade.
This is your foundation for durability. It resists rust, maintains temperature like a champ, and won’t leach any weird flavors into your drink. I personally steer clear of anything less because I want my tumbler to last for years, not months.
Second, pay close attention to the insulation. Double-wall vacuum insulation is the gold standard. This magical technology is what keeps your iced coffee cold for hours even in scorching summer heat, and your hot tea piping hot throughout your commute.
If a tumbler doesn’t clearly state “double-wall vacuum insulated,” it’s probably not going to perform as well, and that’s a deal-breaker for me. For eco-friendliness, choosing a durable, reusable tumbler is already a huge step, reducing single-use plastic waste.
But beyond that, consider brands that are transparent about their manufacturing processes and materials. Some even offer replacement parts, which is a big plus for extending the life of your tumbler.
I’ve found that investing a little more upfront in a well-made tumbler from a reputable brand always pays off in the long run. It means fewer replacements, better performance, and a clear conscience about your environmental impact.
It’s truly about getting the best bang for your buck while also doing your part for the planet.